A favicon, which is short for “favorite icon,” is a tiny picture or icon that materializes on the browser tab of your website. Its purpose is to help visitors effortlessly recognize your website among the excessive amount of other tabs. By adding a customized favicon to your website, you can swiftly and effortlessly upgrade your site’s branding and make it more recognizable to your audience. Here are the steps you can follow to add a custom favicon to your website with ease.
Step 1: Design your favicon
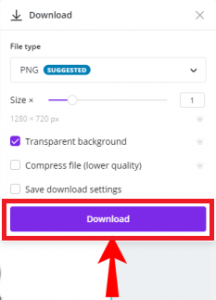
The primary step is to design your favicon image. This image should be square-shaped, with a minimum of 32 pixels by 32 pixels and a maximum of 150 pixels by 150 pixels in width and height for optimal presentation on high-resolution devices. You can use any image editing software, such as Adobe Photoshop or Canva, to design your favicon. Once you’ve crafted your favicon, save it as an .ico or .png file format.
Step 2: Upload your favicon to your website
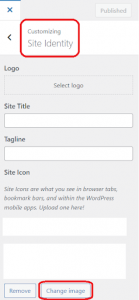
After creating your favicon, log in to your WordPress website’s dashboard and head to Appearance > Customize. Then, click on the Site Identity tab. Scroll down to the Site Icon section, and click on Select Image or Change Image. Pick the favicon image you created in Step 1 from your computer and click on the Select button to upload it to your website.
Step 3: Preview and publish your new favicon
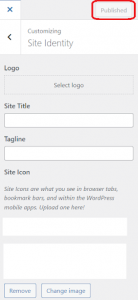
Upon uploading your favicon, a preview of how it will appear in the browser tab will show up. If you are content with how it looks, hit the Publish button to save your changes. If you want to make further adjustments, you can keep editing until you’re satisfied with the outcome.
Step 4: Clear cache and refresh the website
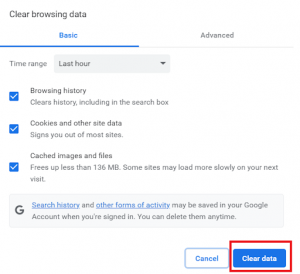
After publishing your new favicon, you may have to clear your website’s cache and refresh the site to see the new favicon. This is due to the fact that the old favicon may still be stored in your browser’s cache. To clear your cache, click Ctrl + Shift + Del (Windows) or Command + Shift + Delete (Mac) on your keyboard. Select the “Cache” option, and then click on “Clear data.”
Congratulations! You have successfully added a custom favicon to your website. Even though it may seem like a trivial detail, it can make a considerable difference in how your website is perceived by your visitors. A skillfully designed favicon can augment your site’s branding, enhance user experience, and make your website more unforgettable.


