|
Last Updated / Reviewed: October 19th, 2023 |
|
GOAL: This document serves as an instructional guide for technicians, providing insights into effectively utilizing and maximizing the new features of the Project Check-in System.PREREQUISITES OR REQUIREMENTS: Before proceeding, ensure that the Project Check-in System, set up by Blackstorm Developers, is in place, including the Job Check-in Form URL and the Authorization Code.WHY THIS IS IMPORTANT: This guide is crucial for enhancing the check-in experience for technicians, resolving potential issues that may arise during system usage. Key Features:
|
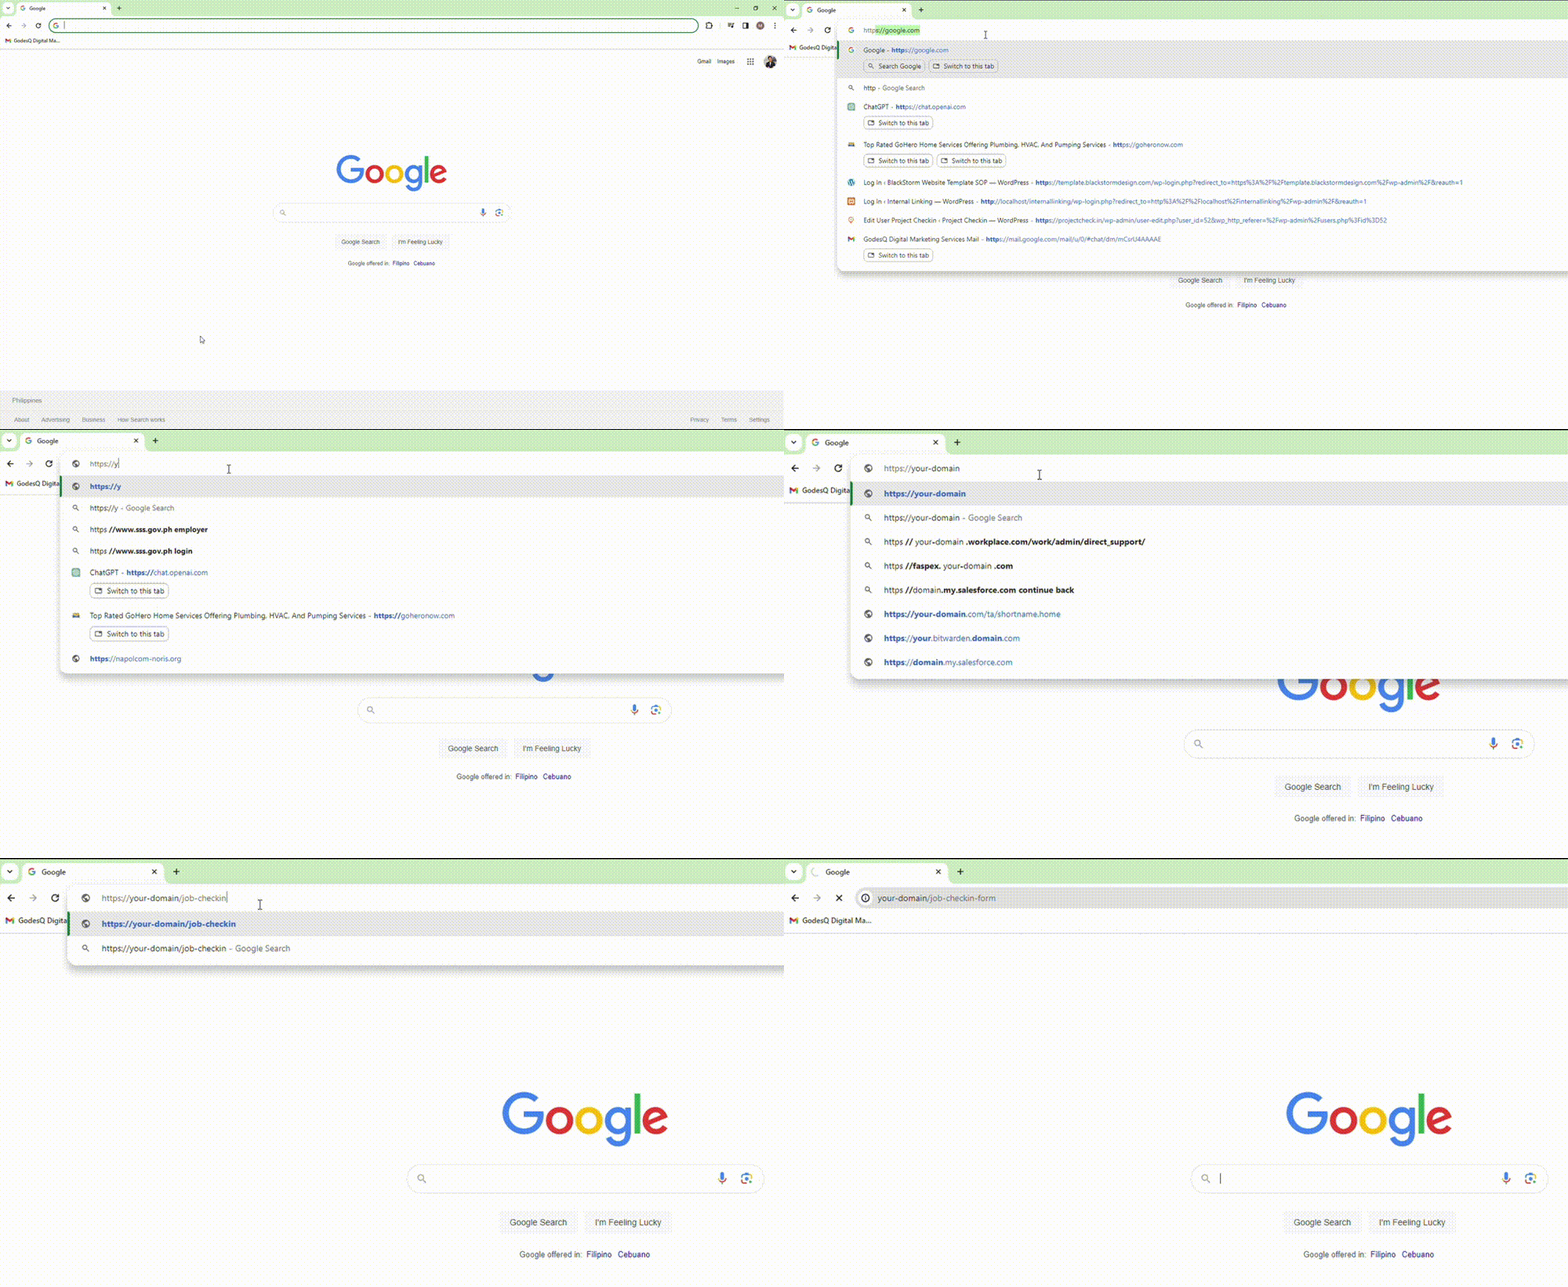
Step 1 – Visit Your Website’s Job Check-in Form Page (Tech Action):Start by navigating to your website’s Job Check-in Form page. Blackstorm Developers will supply you with the Job Check-in Form URL and the Authorization Code, typically presented as follows: Form URL: https://domain.com/job-checkin-form/ Auth Code: DMN2023 |
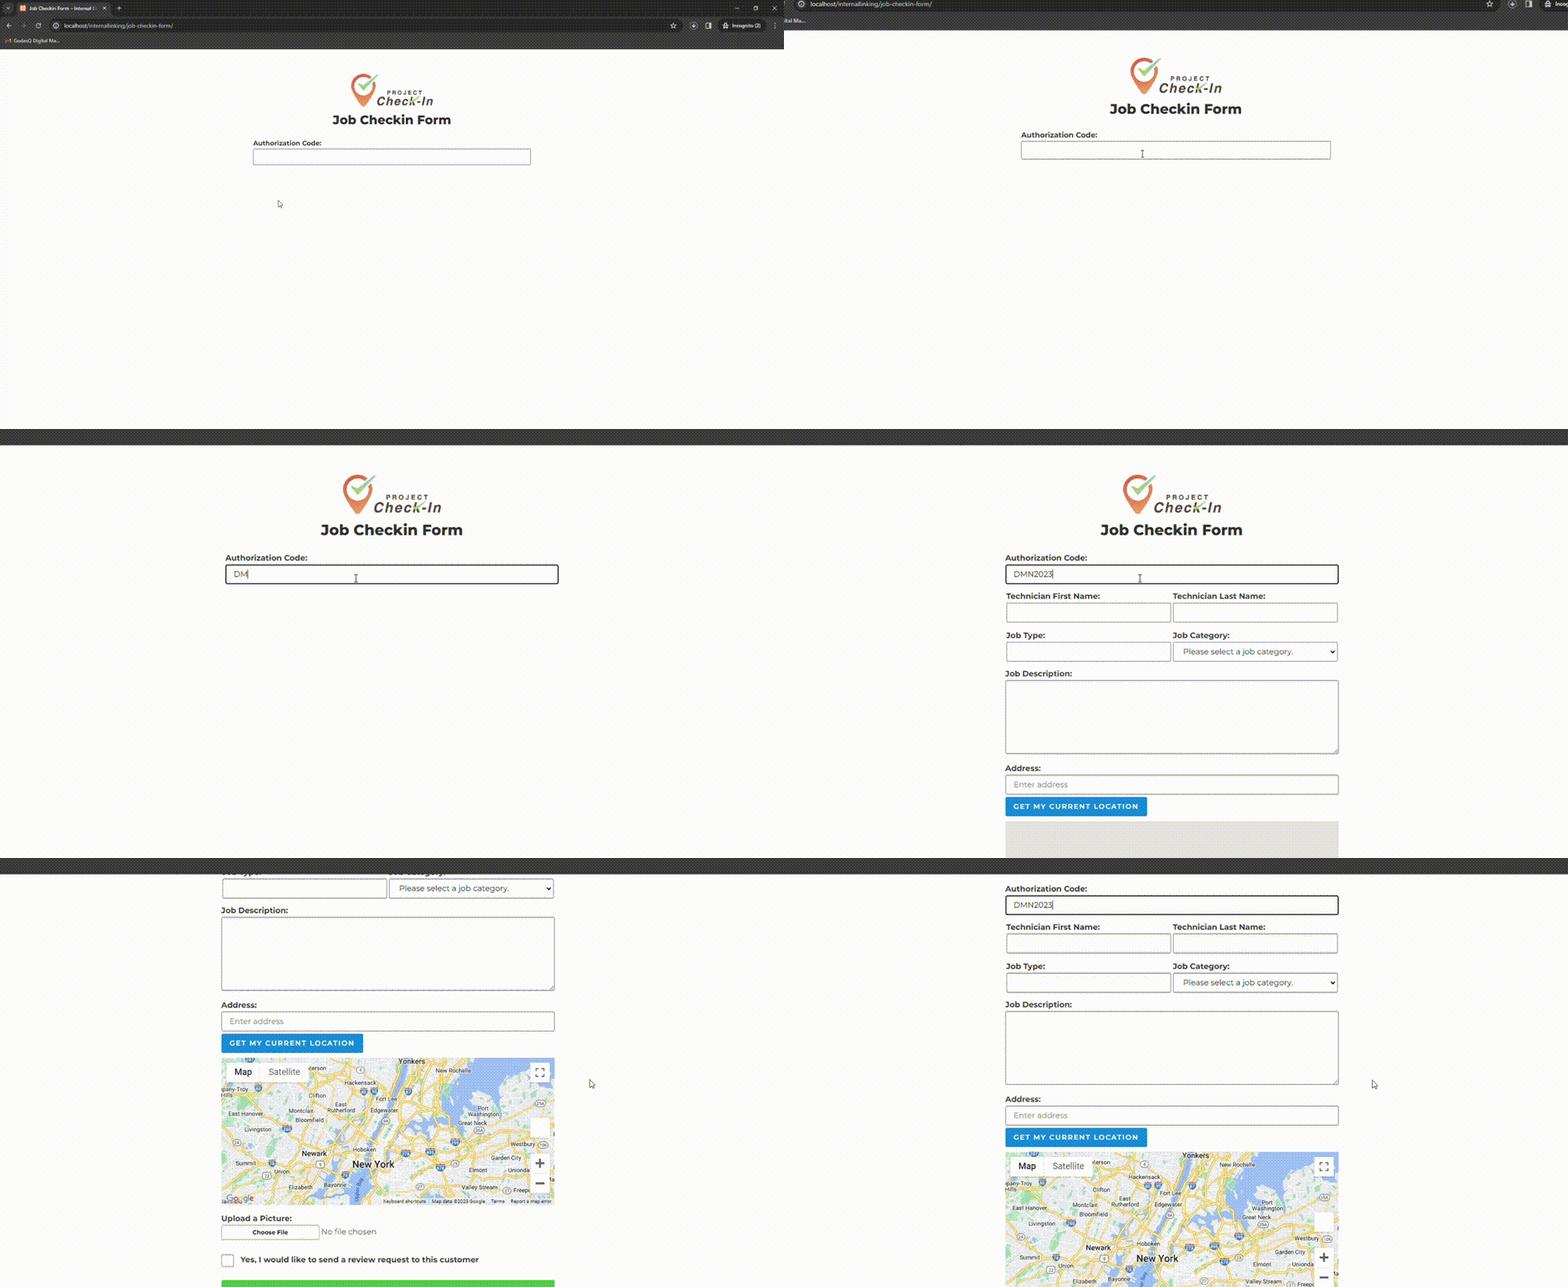
Step 2 – Input the Authorization Code (Tech Action)Initially, the entire form remains hidden from public view. Once the authorization code is provided, the form becomes accessible. |
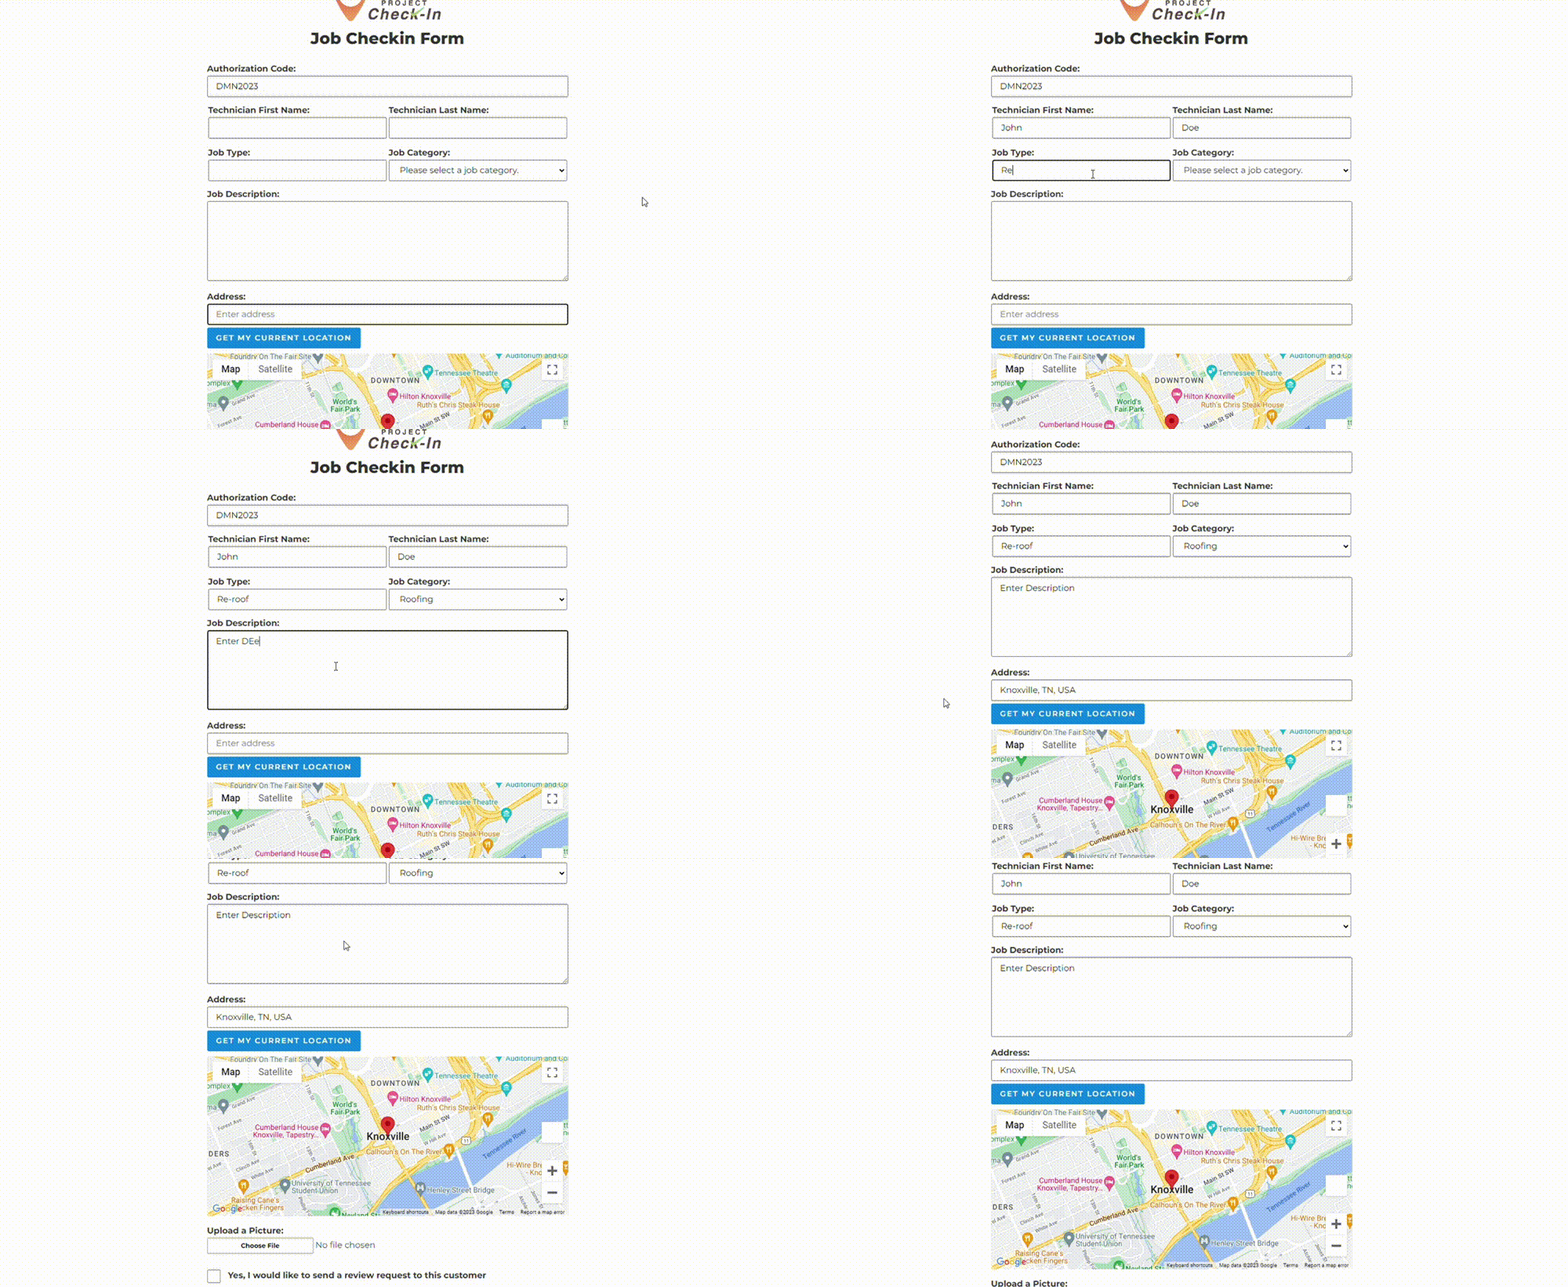
Step 3 -Complete All Required Form Fields (Tech Action):Fill in the necessary fields on the form, including:
|
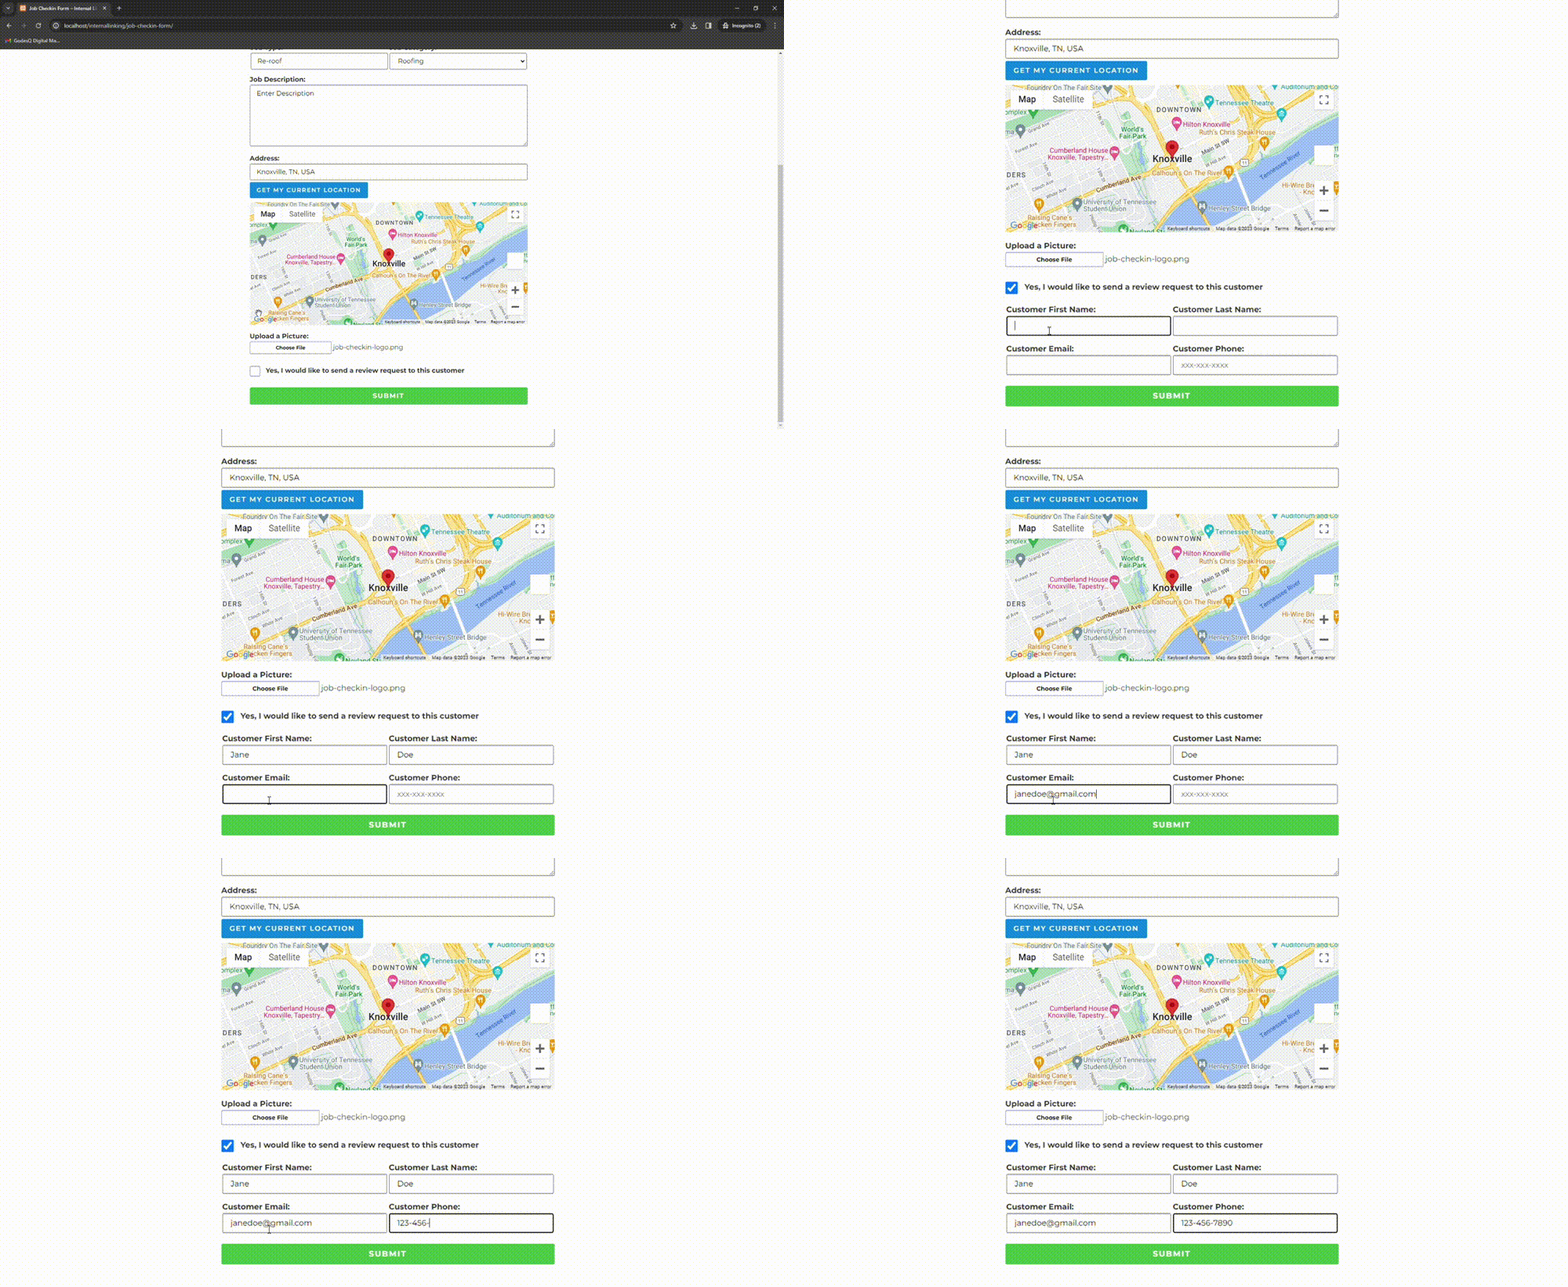
Step 4 – Request a Customer Review (Tech Action)Should you wish to request a review from the customer, check the “Yes, I would like to send a review request to this customer” checkbox. This action prompts the technician to enter the customer’s name, phone number, and email address. An email and SMS notification will be sent to the customer. |
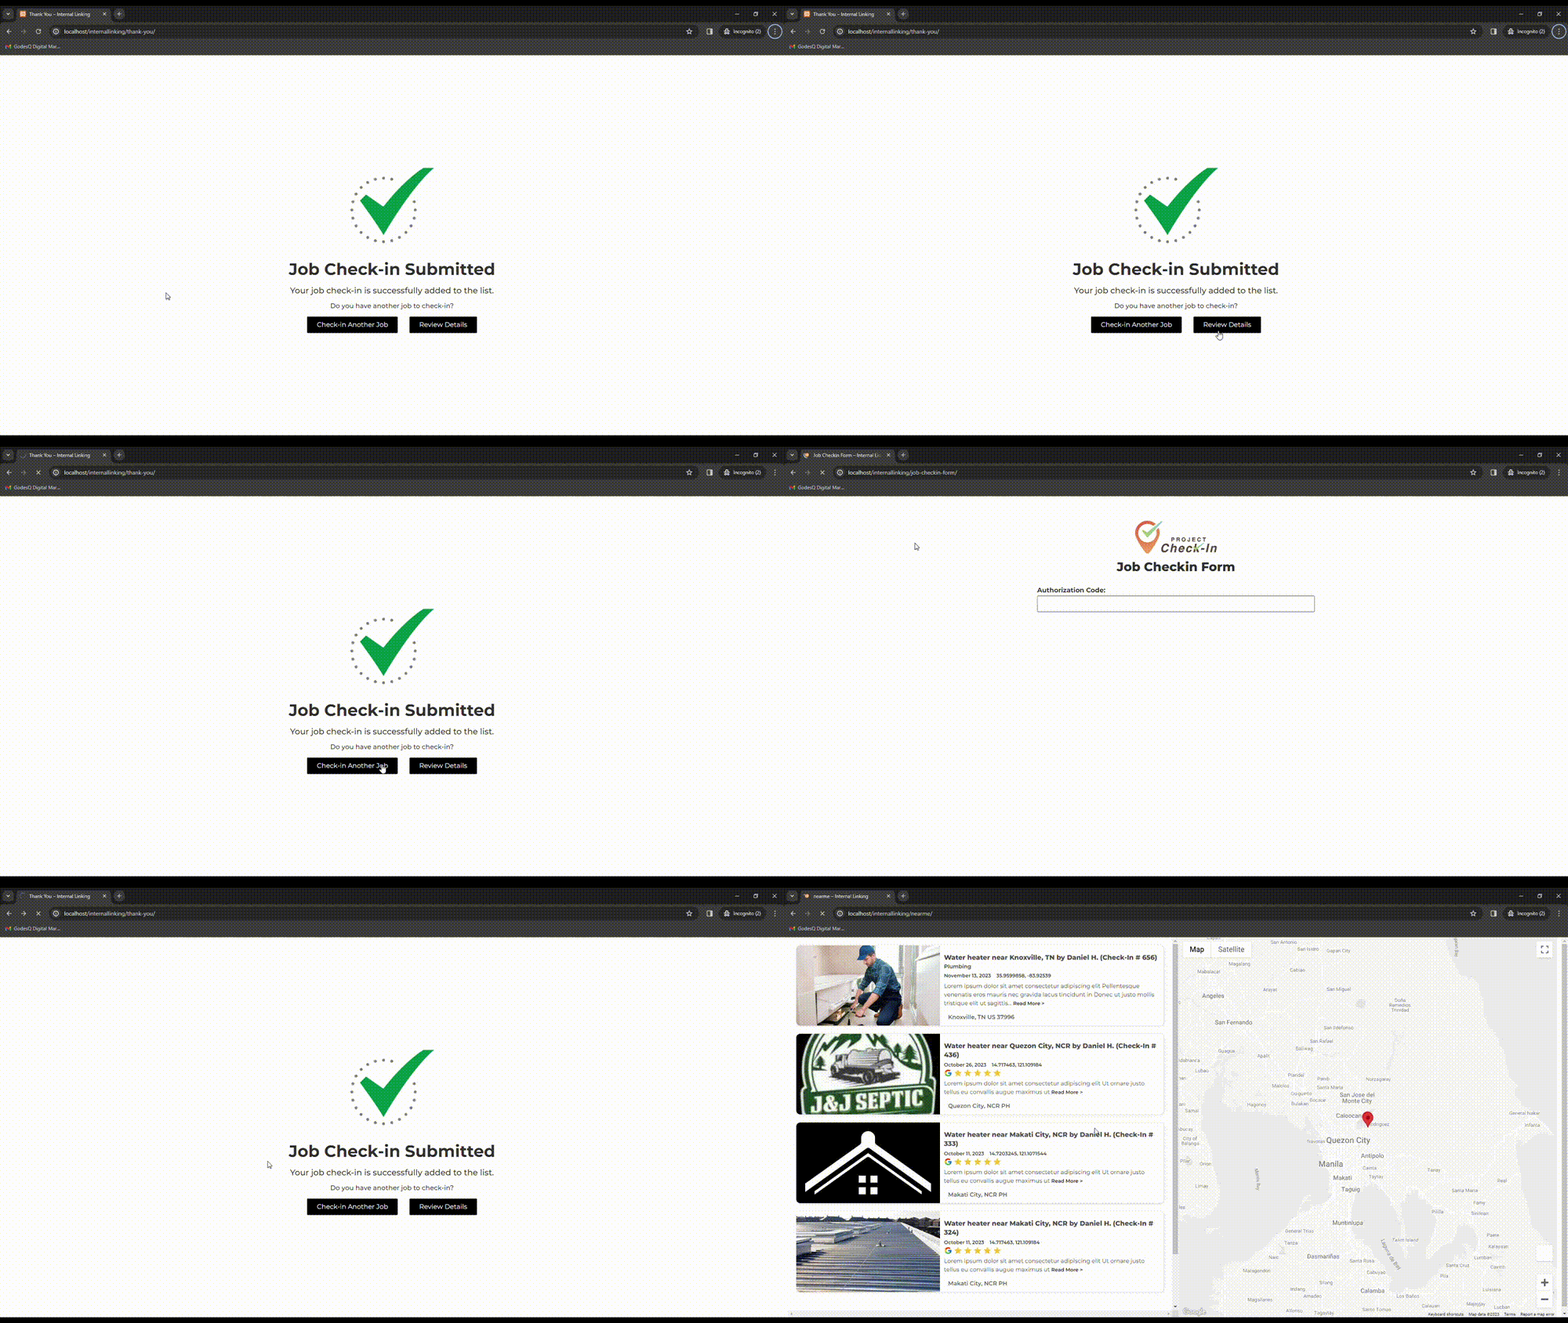
Step 5 – Submit The Form (Final Tech Action)Upon submission, the uploaded image will be compressed, the details will be posted to the Google Business Profile, and the information will be added to the check-in listing. If a review request is checked, the submission will trigger email and SMS notifications to the customer. |
Step 6 – Review Details (Optional)Visit the “/nearme/” page to confirm the accuracy of the location and other details. You can also double-check the job you’ve checked in to ensure all information is correct. |
Step 7 – Customer Review (Customer Action)Customers will receive notification of the review request via email or SMS, accompanied by a link to the Google Review. |
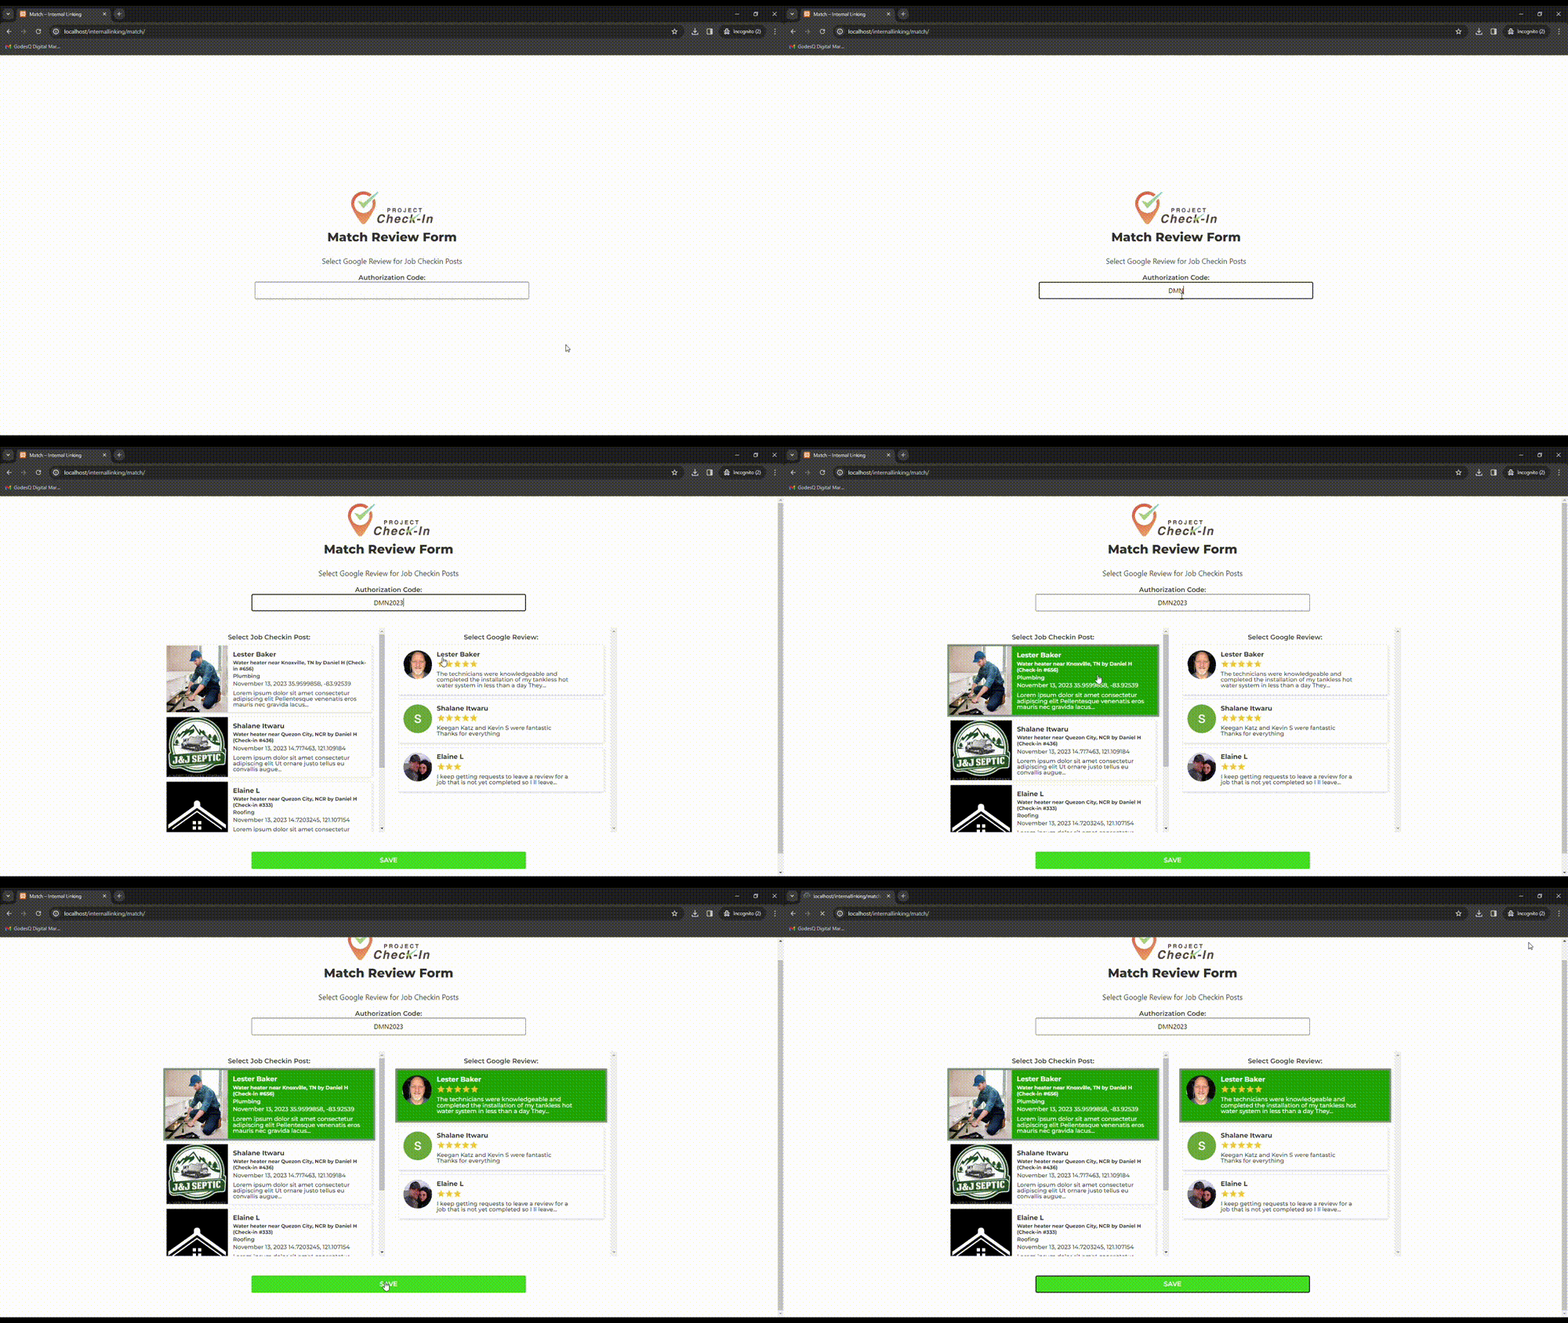
Step 8 – Match Review (Client Action)Proceed to the “/match/” page to access the form for matching project check-in reviews with Google Reviews. Input the Authorization Code and select the project check-in and Google review entries you want to match. |
Viewing Duplicate and Spam Leads in WhatConverts
Do you need help with duplicate and spam leads in your WhatConverts? Follow these simple


