Quick-Step List:
- Click the gear icon in Gmail and select “See all settings” from the Quick settings menu.
- Navigate to “Filters and Blocked Addresses” in the top menu.
- Select “Create a new filter.”
- Add a specific email or a whole domain in the “From” field.
- Click “Create filter.”
- Check “Never send it to Spam” in the checkbox.
- Click “Create filter.”
Step by Step Instructions:
Click the gear icon in Gmail and select “See all settings” from the Quick settings menu.
In your Gmail inbox, there is a gear icon in the top right corner. When you select it, you’ll either get a “Quick settings” menu (see below) or a drop-down with several options to choose from.
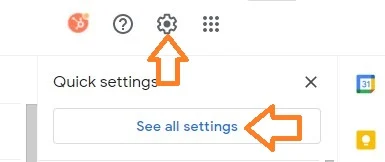
If you get the “Quick settings” menu, you’ll select See all settings. Otherwise, navigate to the Settings option.
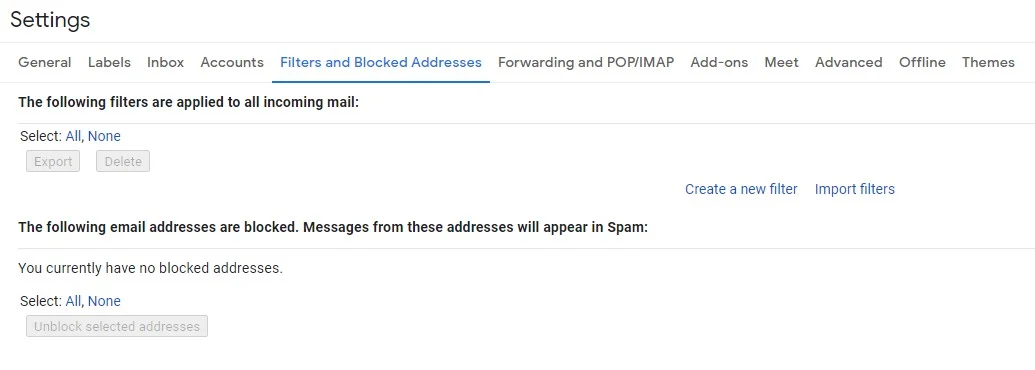
2. Navigate to “Filters and Blocked Addresses” in the top menu.
Once you’re in your expanded settings area, you’ll want to click Filters and Blocked Addresses in the top menu. You’ll end up on a page that looks like this:
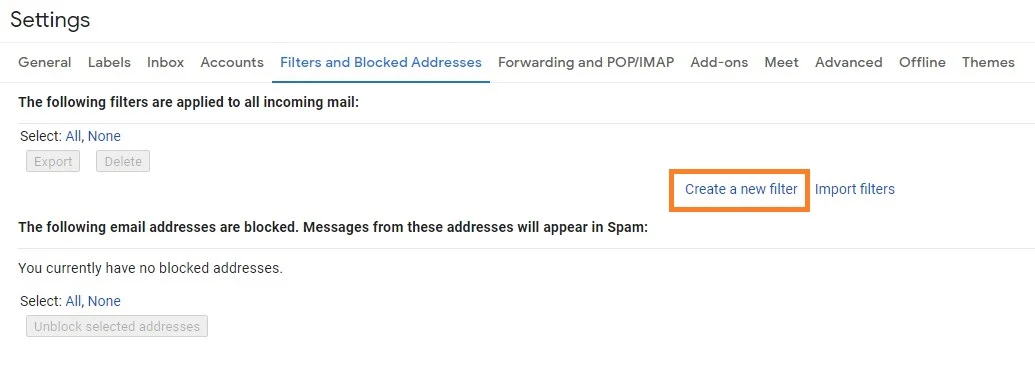
3. Select “Create a new filter.”
In Gmail, whitelisting an email involves creating a filter.
4. Add a specific email or a whole domain in the “From” field.
The “From” field is where you’ll specify what’s getting whitelisted. In Gmail, you can specify either a specific email address (e.g. hello@domain.com) or whitelist a whole domain by omitting everything before the at symbol (e.g. @domain.com). The former will whitelist one specific email address while the latter whitelists anyone who is sending email from that domain.
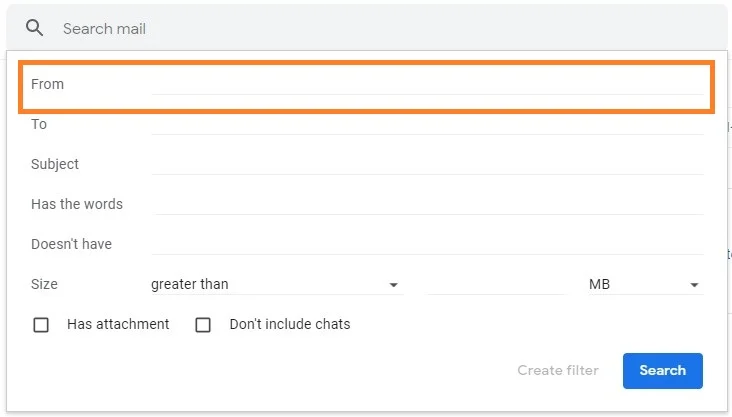
5. Click “Create filter.”
From there, you don’t need to input any additional information. Simply click the Create filter button at the bottom of the window (next to the blue Search button).
6. Check “Never send it to Spam” in the checkbox.
Clicking the button brings up a new window. Here’s where you’ll actually specify that what you’re doing is whitelisting. In Gmail, you do this by checking the Never send it to spam box. Doing so will ensure that emails that meet the criteria you specified never end up in Spam or Trash (unless you do so manually).
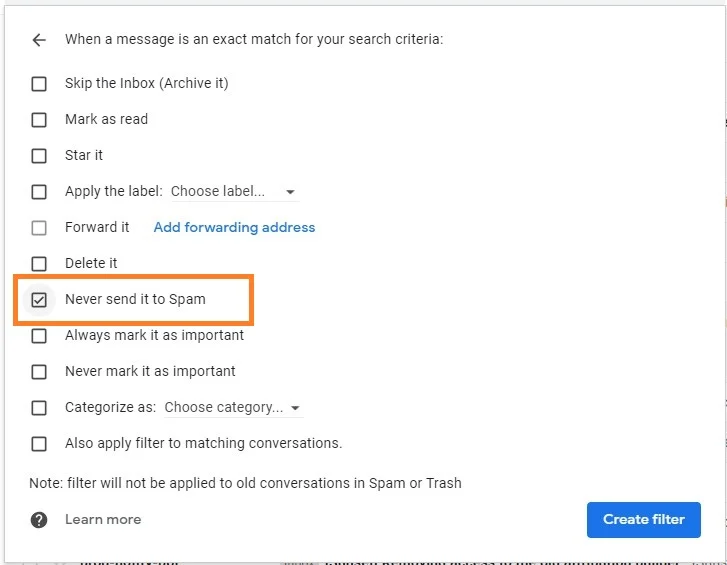
7. Click “Create filter.”
Once this information is specified, you click the “Create filter” button again, creating the whitelist within Gmail.